Product Features
 OEM Agreement
 Available When Installed
 No Program Design Required
 Upgrade
Demo of functions
 Intelligent seat adjustment
 Automatic windows up / sunroof closing
 Audible prompt for car locking
 Ambient lights flashing
 Remote control car search
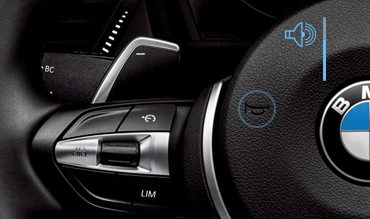 Horn volume level
 Prompt for window not closing
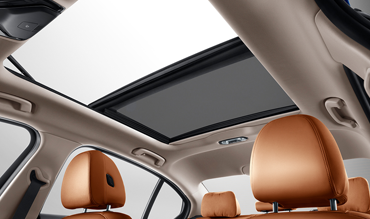 Prompt for sunroof not closed
 Prompt for door ajar
 Prompt for ignition on
 Light still on warning
 Parking light flashing for wipers at maximum speed
 Open or close trunk door by voice button
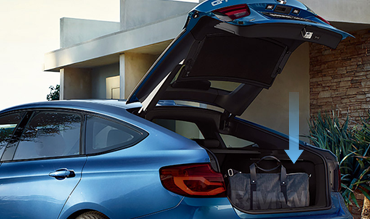 Automatic trunk door closing while driving
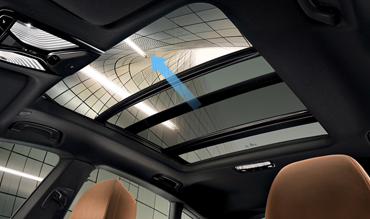 Automatic sunroof closing on raining
 Ambient lights pulsing
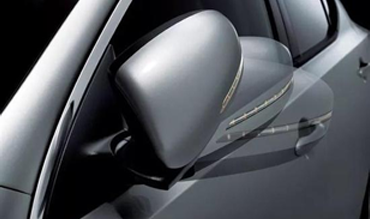 Automatic rear view mirror folding
 Prompt for ignition on
 Lights for returning home
 Lighting for steering aid
 Parking light flashing for car door emergency
 Automatic parking light flashing on backing up
Advanced Features(15 functions for the basic version、22 functions for the advanced version)
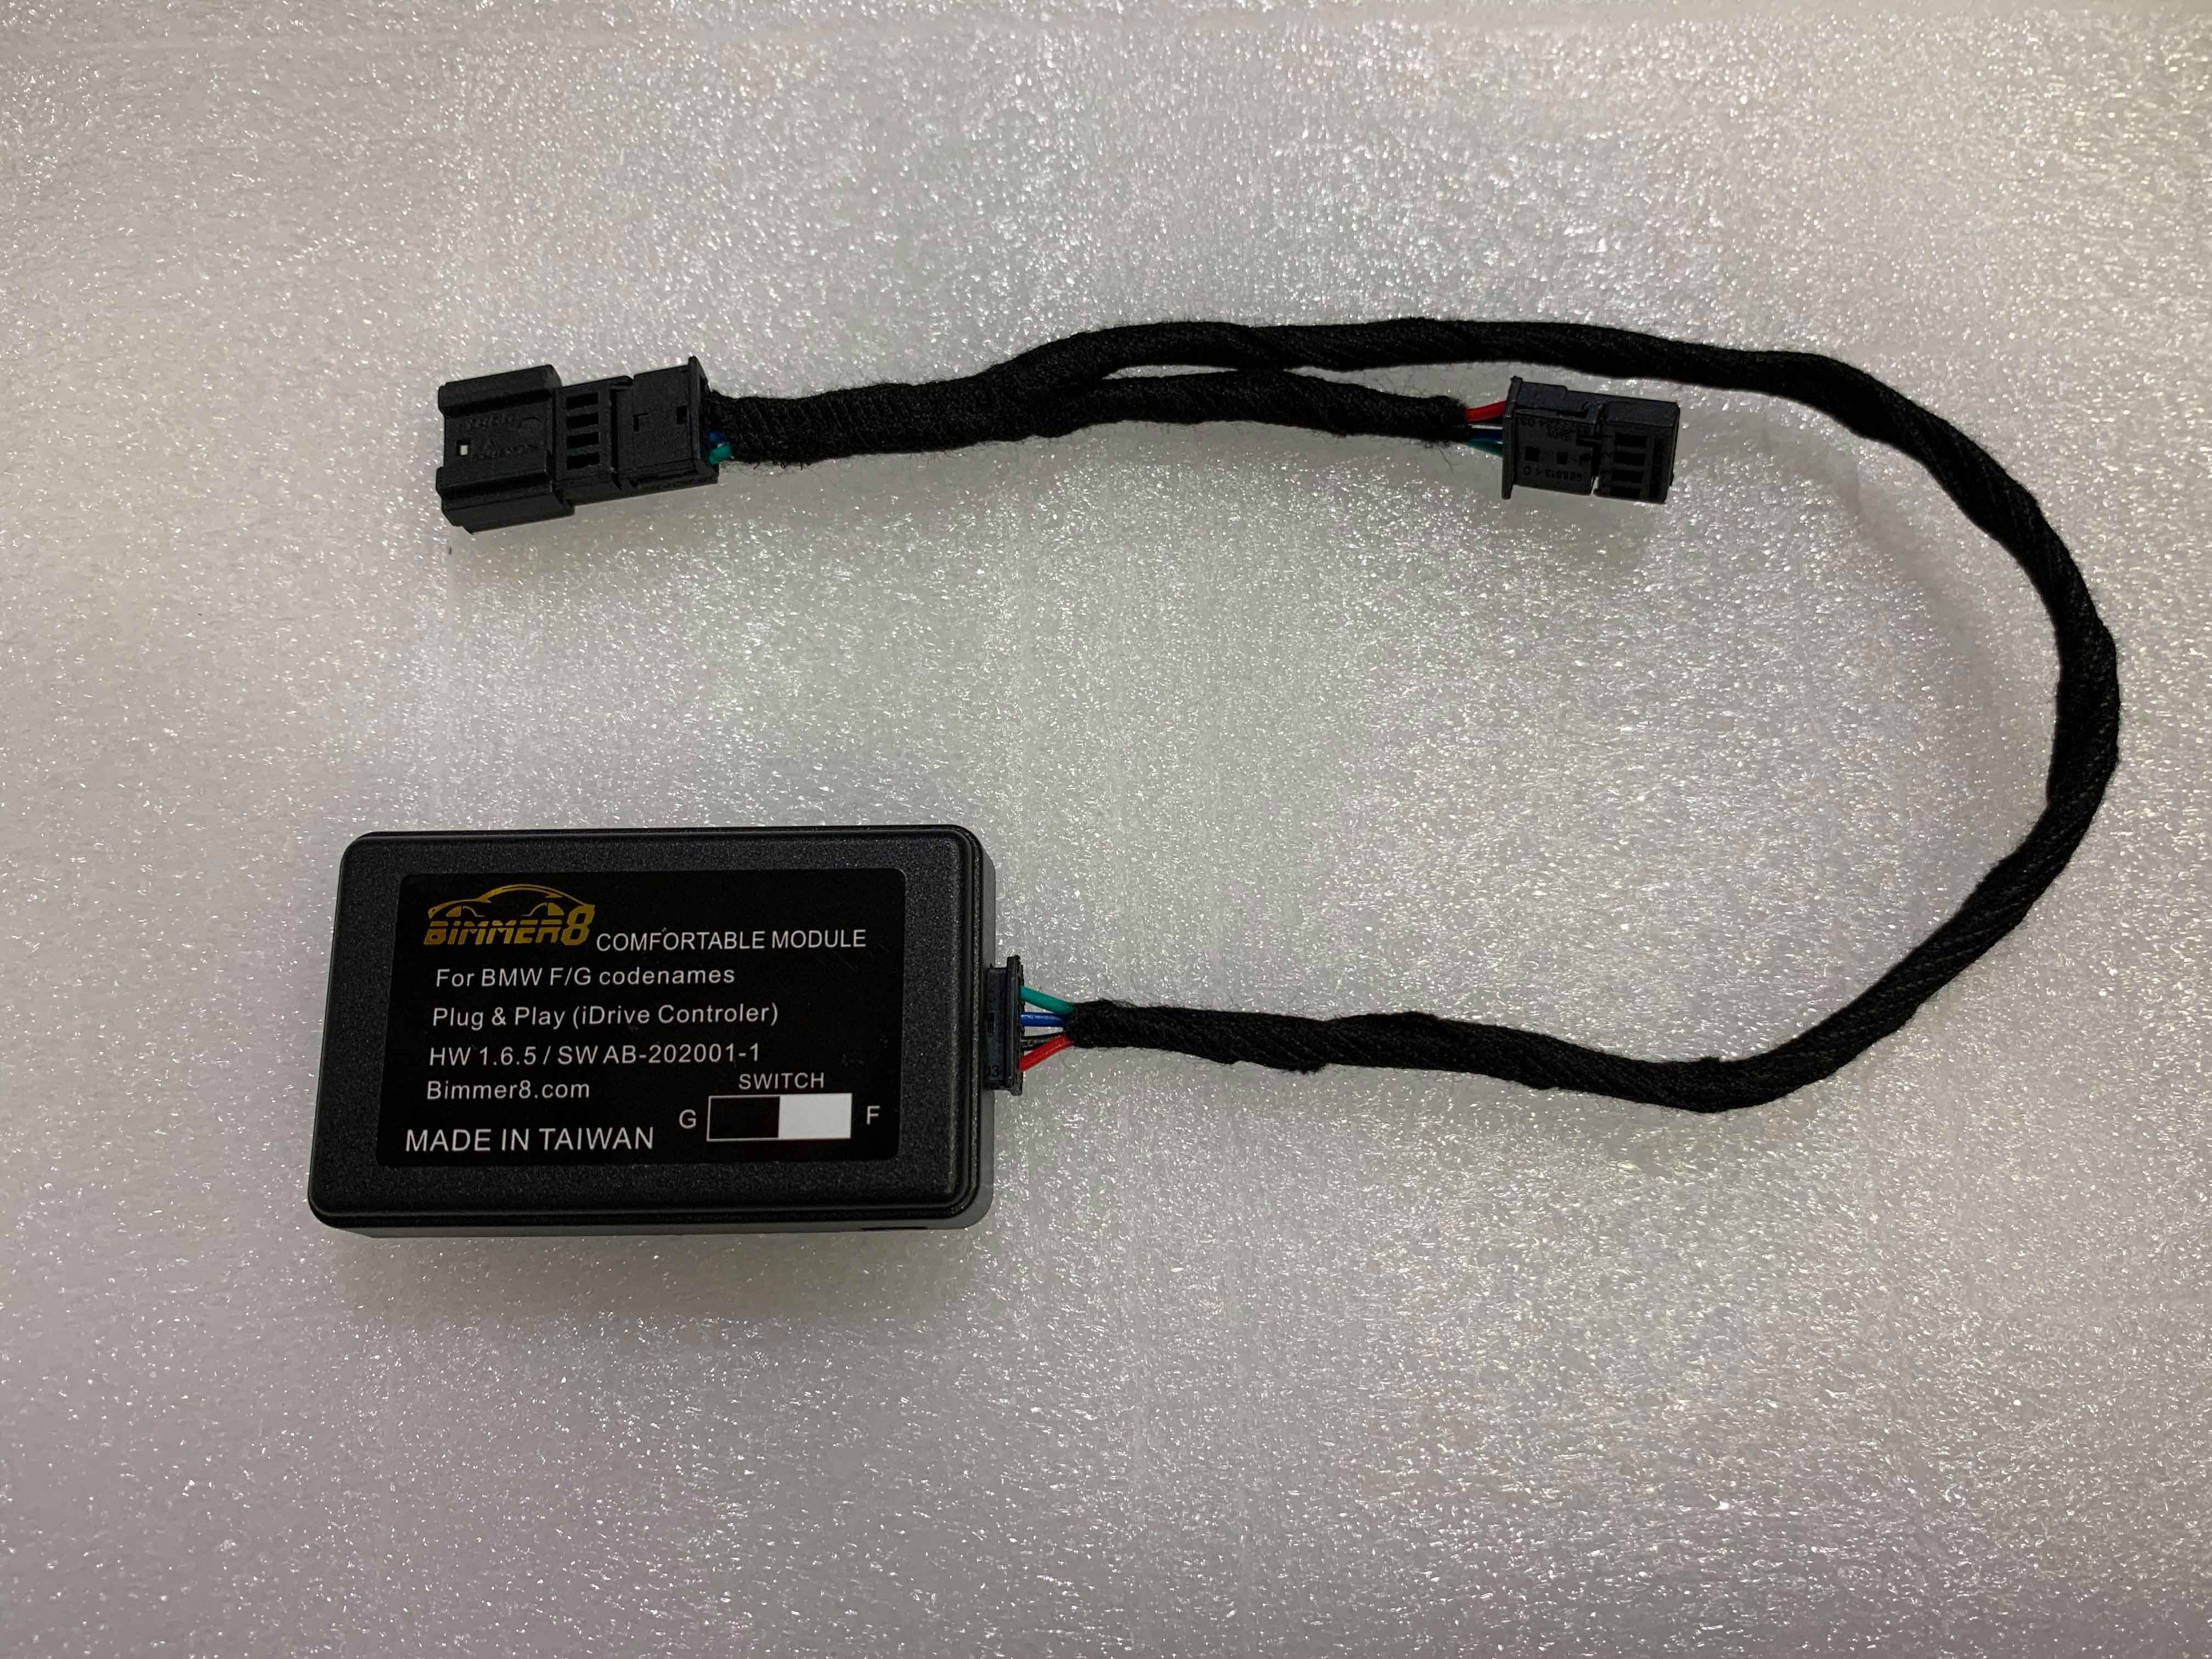
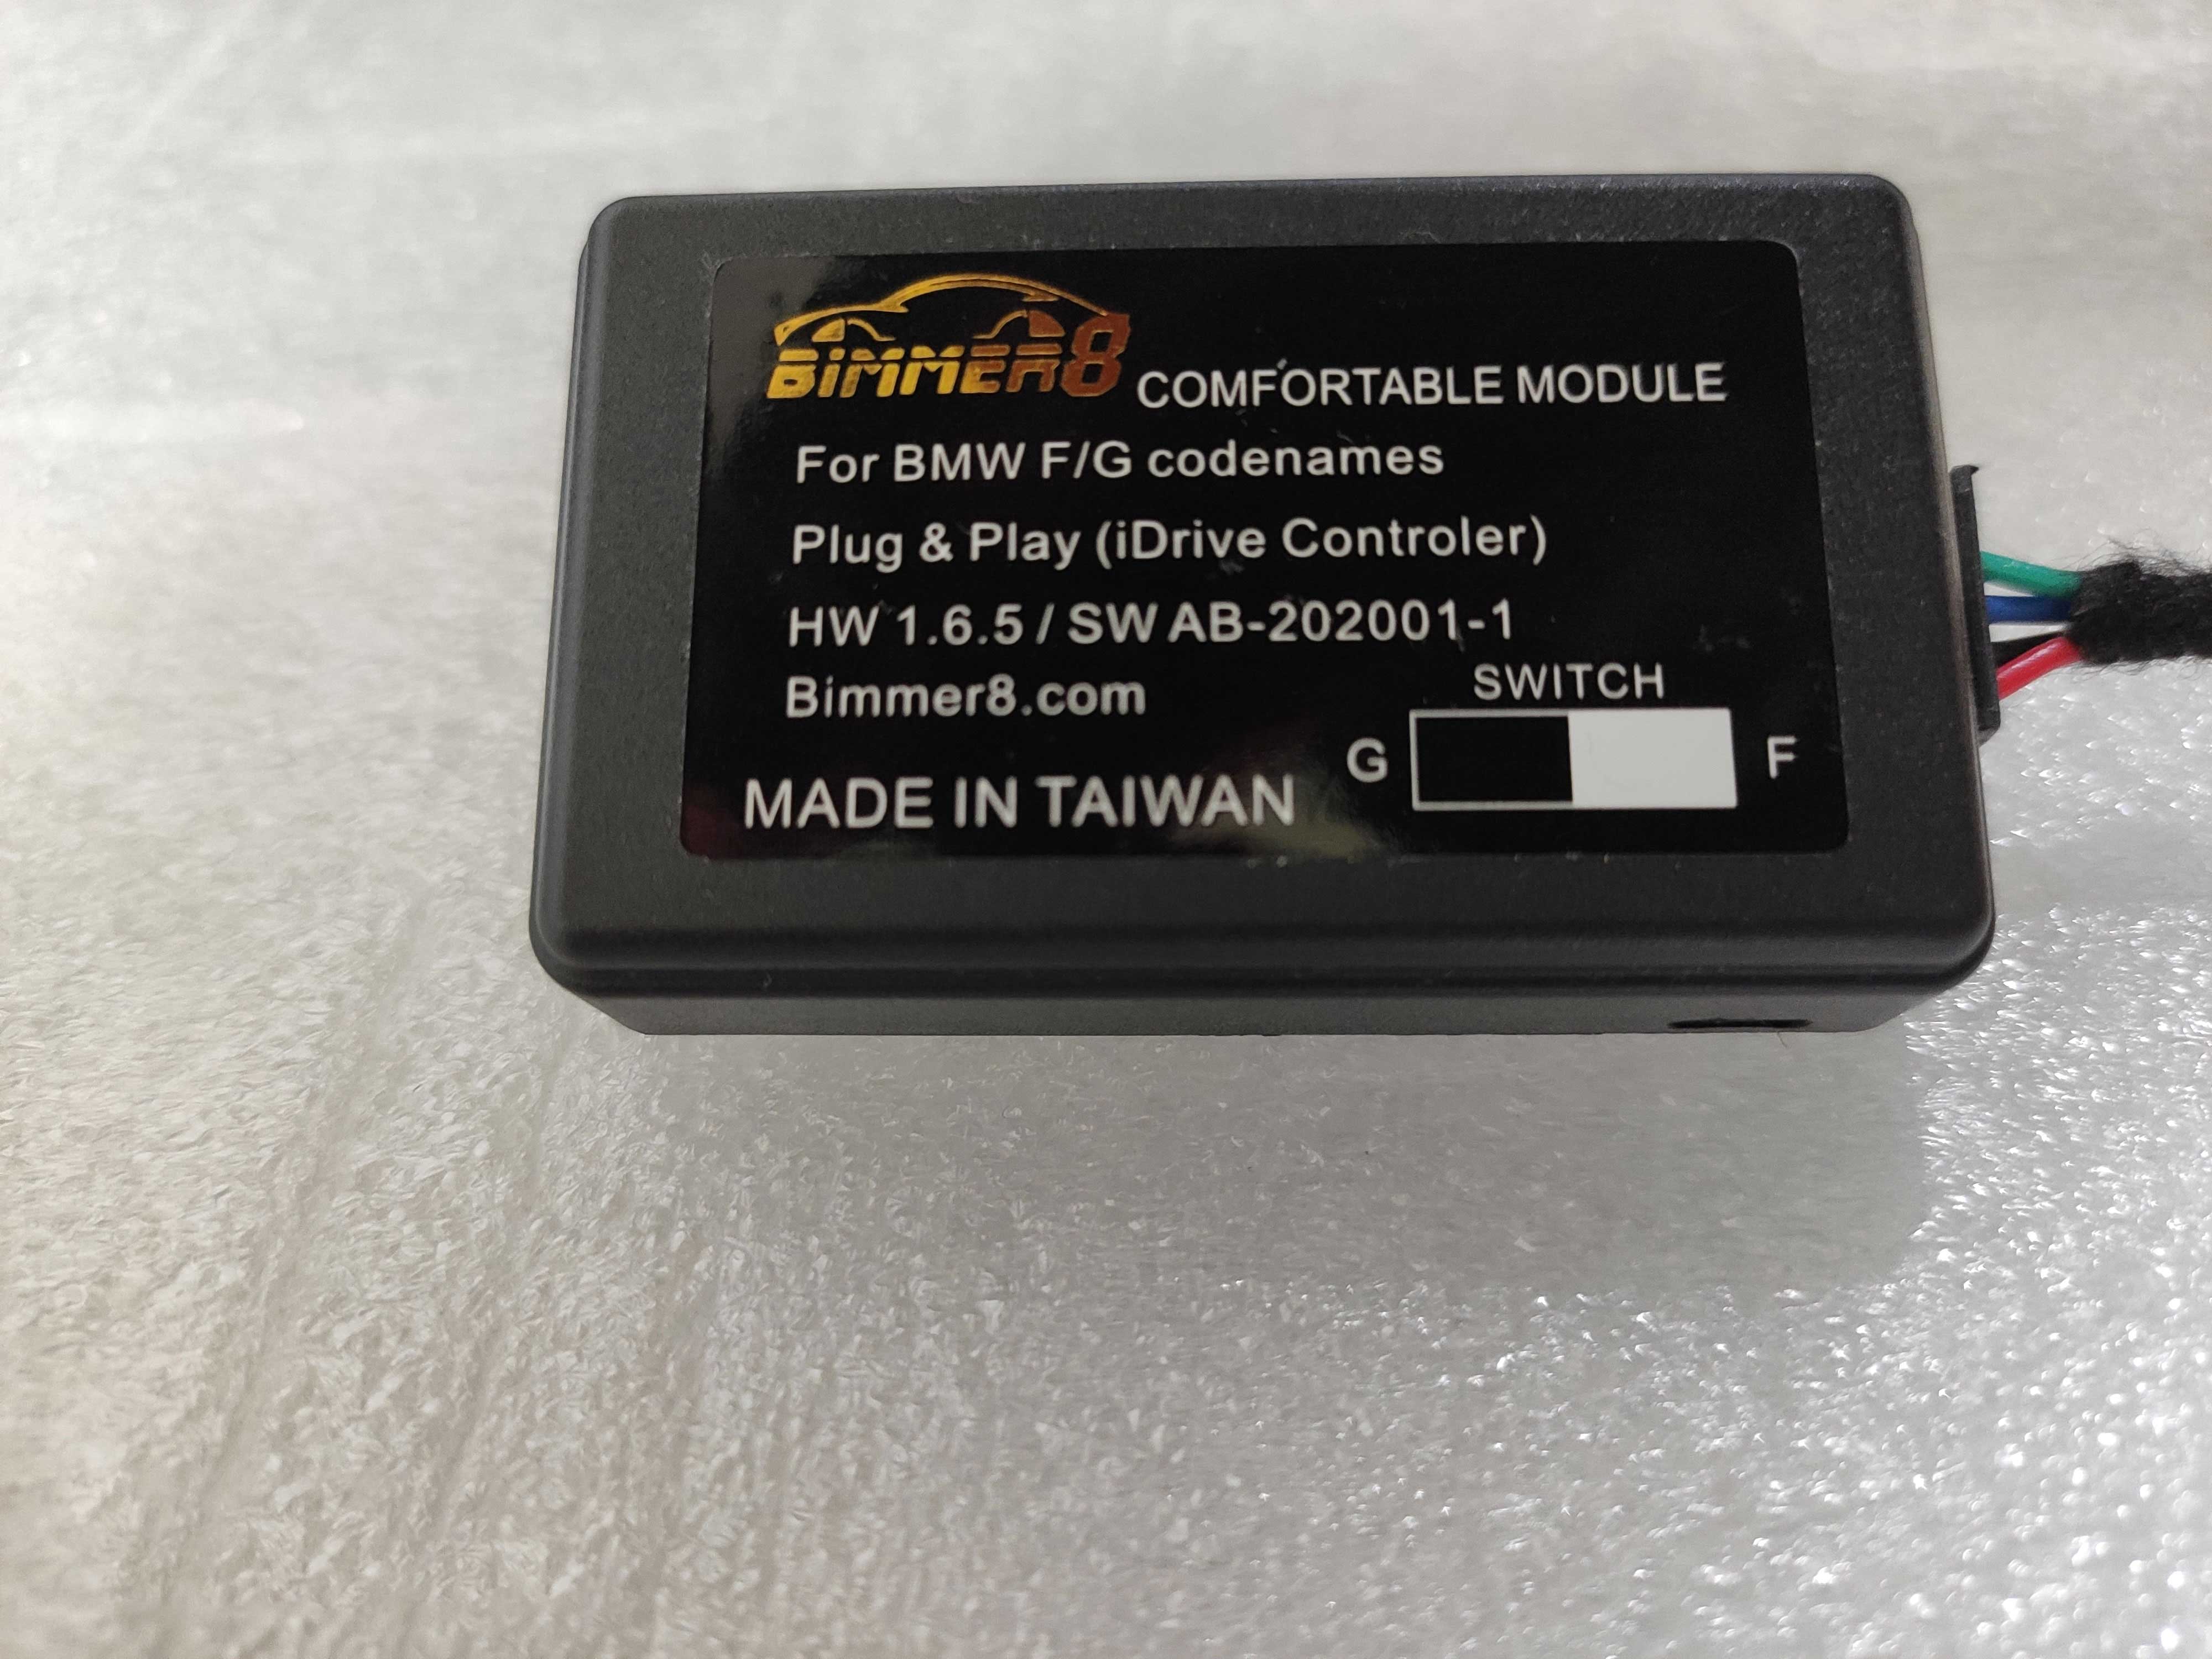
(Chassis G only)
(Chassis G only)
3H Product requirement standards


The products are suitable for the following series/years:
| 1 Series | 2 Series | 3 Series | 3GT | 4 Series |
| 2013-2018 | 2014-2018 | 2013-2018 | 2013-2018 | 2013-2018 |
| 5 Series | 5GT | 6 Series | 7 Series | X1 |
| 2013-2018 | 2013-2016 | 2013-2018 | 2013-2018 | 2016-2018 |
| X2 | X3 | X4 | X5 | X6 |
| 2017-2018 | 2013-2018 | 2014-2018 | 2014-2018 | 2014-2018 |
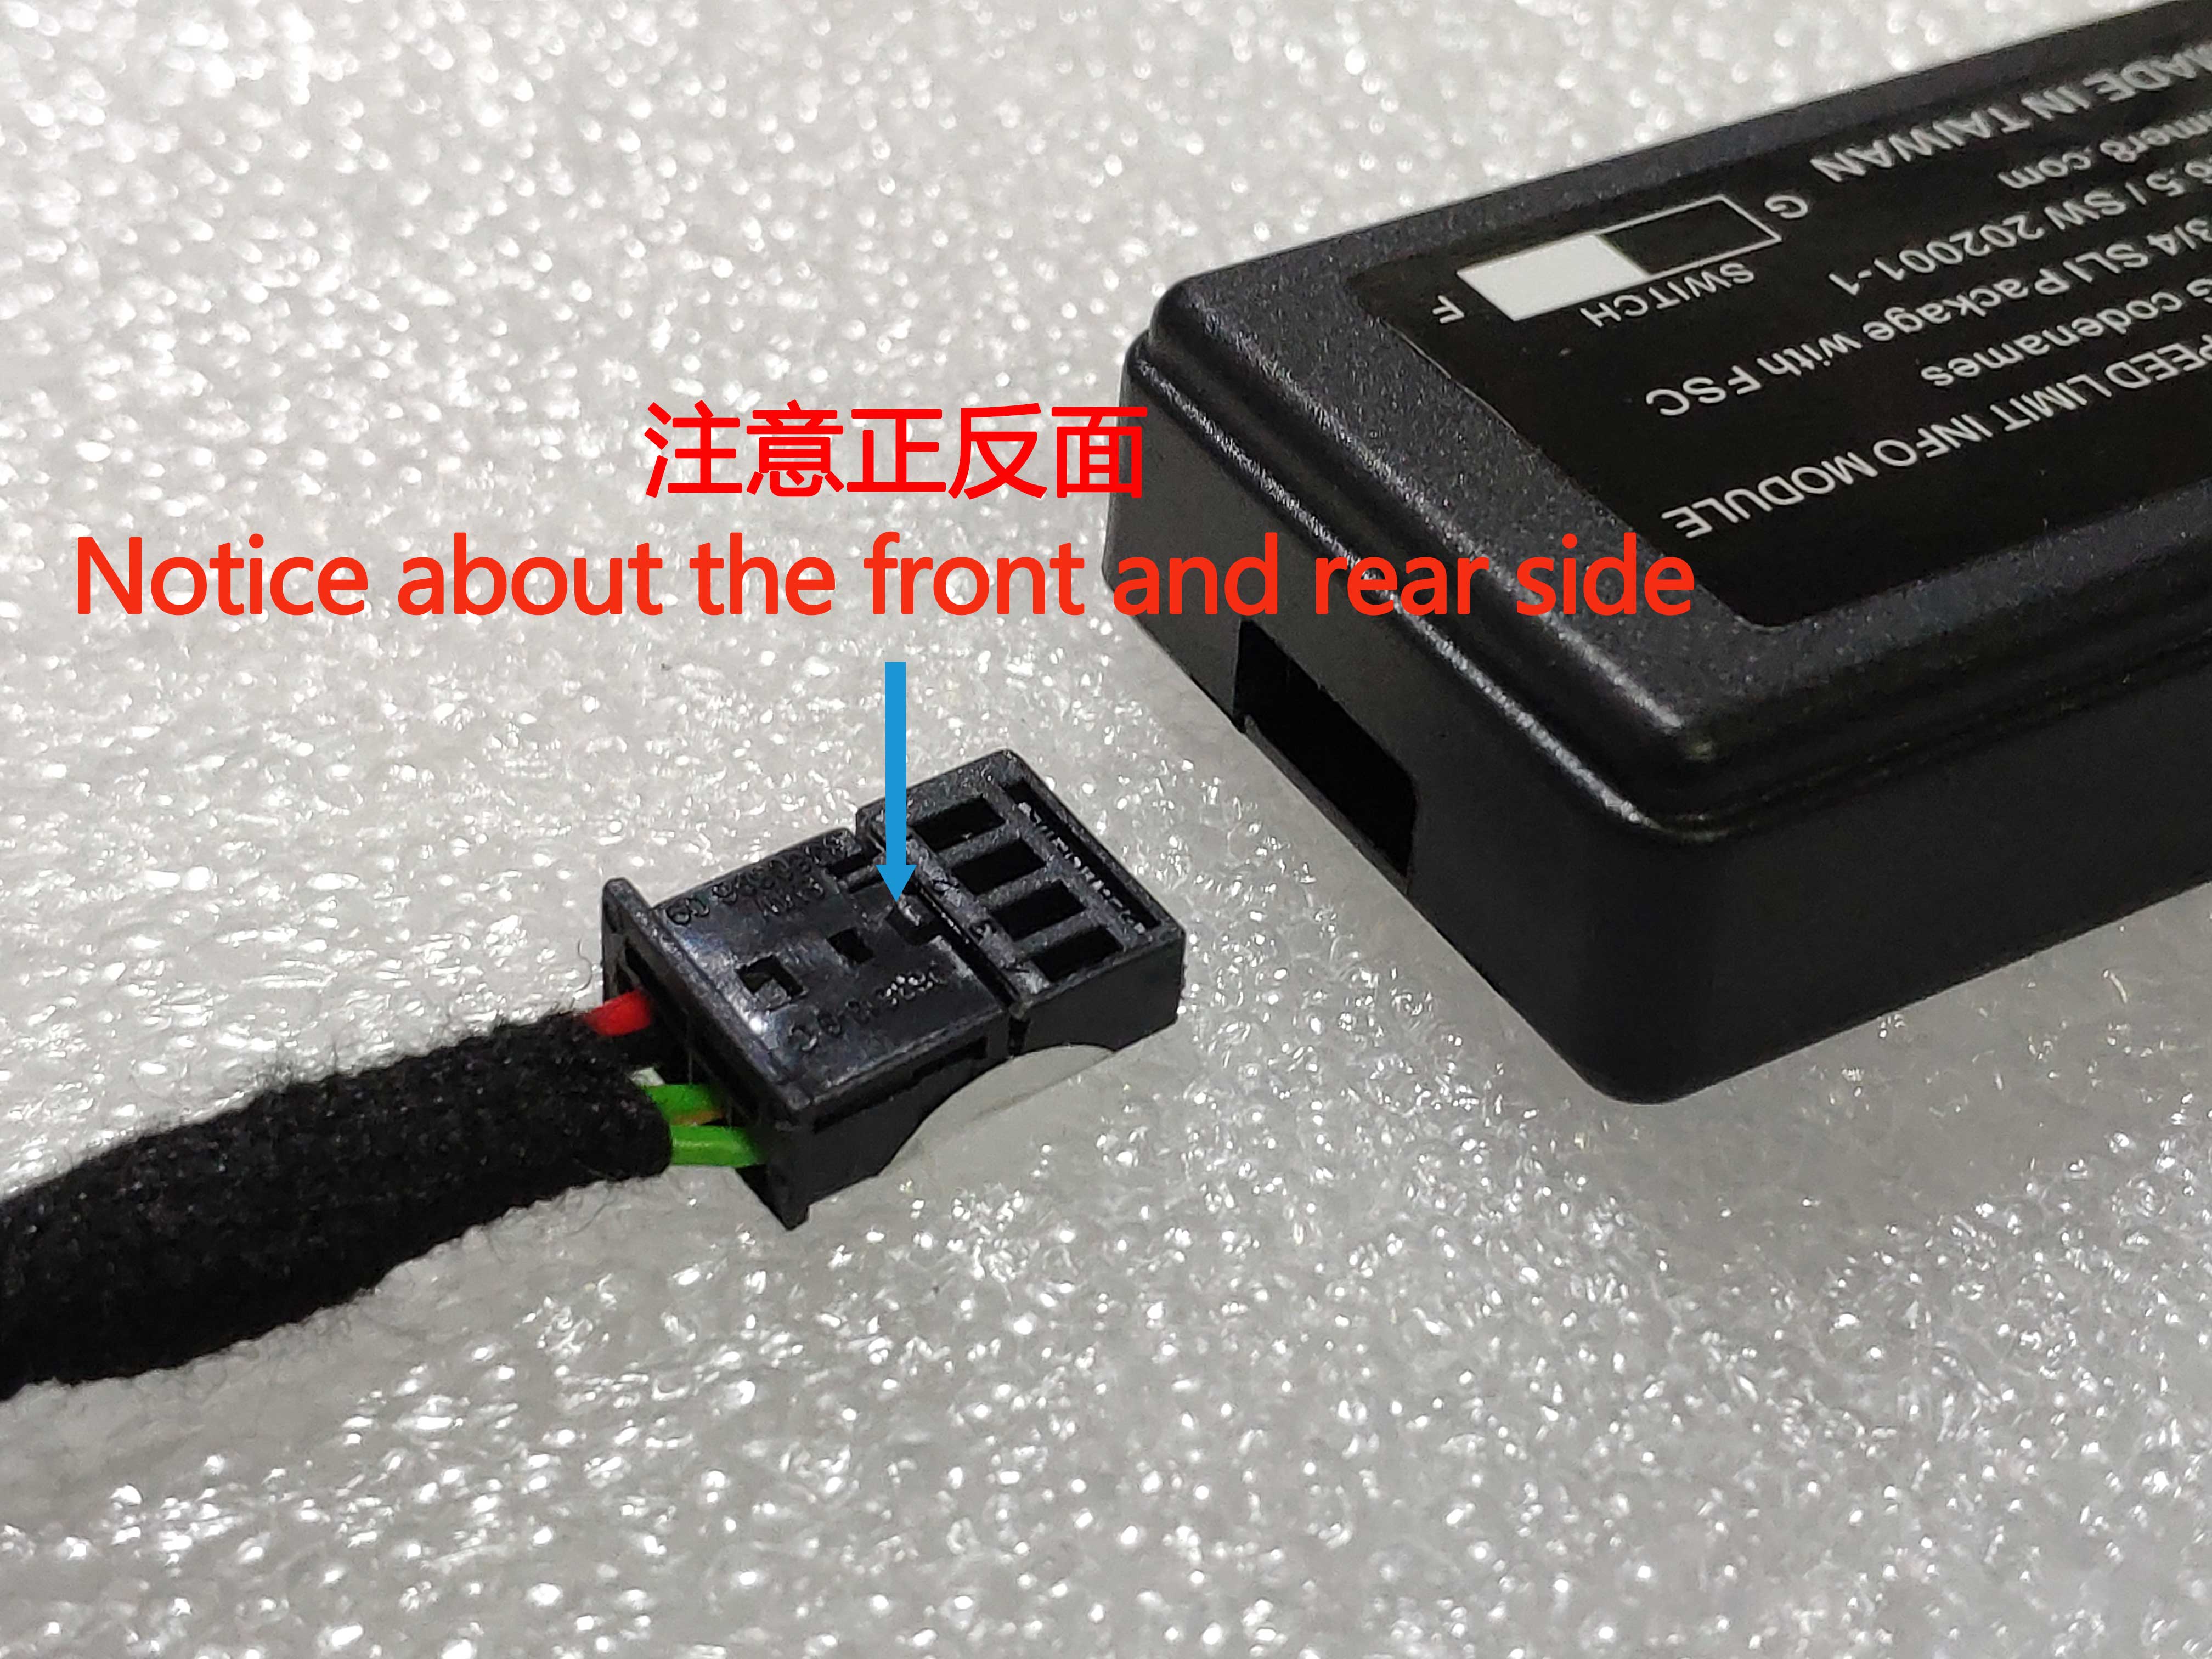
- Notes:Our products support Series F and G. There is a switch on the side of the product module. Select the position with the switch corresponding to your car model. (Do not select with the switch while the module is still connected to power.)
Description of functions
| Horn prompt for car locking | 1+Mute | (Default:activated) |
| Parking light flashing for car door emergency | 2+Mute | (Default:activated) |
| Intelligent seat adjustment (electric seat required on board) | 3+Mute | (Default:activated) |
| Automatic windows up on car locking, automatic sunroof closing on ignition off | 4+Mute | (Default:activated) |
| Automatic rear view mirror folding (electric rear view mirrors required on board) | 5+Mute | (Default:activated) |
| Lighting for steering aid | 6+Mute | (Default:activated) |
| Parking light flashing for remote control car search | 7+Mute | (Default:activated) |
| Horn volume level (high/low) | 11+Mute | (Default:activated) |
| Automatic parking light flashing on storm | 22+Mute | (Default:activated) |
| Automatic sunroof closing on raining | 33+Mute | (Default:activated) |
| Ambient lights pulsing(Chassis G only) | 44+Mute | (Default:activated) |
| Ambient lights flashing(Chassis G only) | 55+Mute | (Default:activated) |
| Automatic trunk door closing while driving(electric trunk door required on board) | 66+Mute | (Default:activated) |
| Trunk door open by voice button(electric trunk door required on board) | 77+Mute | (Default:activated) |
| Prompt for leaving the car while the ignition is still on | 111+Mute | (Default:activated) |
| Lights for returning home | 222+Mute | (Default:activated) |
| Automatic parking light flashing on backing up | 333+Mute | (Default:activated) |
| Activate all functions | 11111+Mute | (Default:activated) |
| Deactivate all functions | 22222+Mute | (Default:activated) |
- 1.Push the digit key mentioned in the program; for example, push 1 and release (do not hold the key) and then 【push and hold】 Mute for 2 seconds or more. Release Mute. The parking lights will blink 3 times signaling the setting is done.
- 2.Each of the individual functions can be activated or deactivated. Only one button can be used at one time. For example, you wish to deactivate functions 1 and 2, you need to push 1 and push and hold Mute for 2 seconds or more. The parking lights signal the setting is done and then you repeat the process with button 2, and so on and so forth.
- 3.If you are working with the digit buttons and make a mistake that causes the function to be deactivated, you can 【Activate All functions】, and then deactivate one by one those you don’t want.
Notes:
Tools and sharp edges may cause injuries!
~Use protection appropriate for the work to be performed~Be careful with the parts and tools used
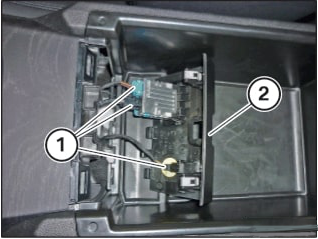
Installation Steps:

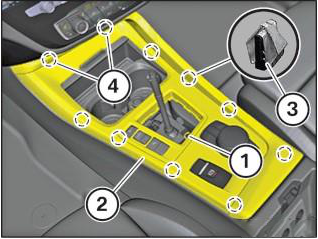
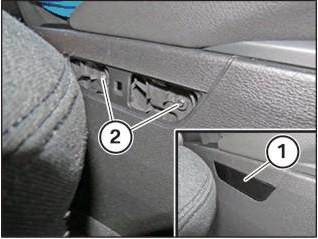
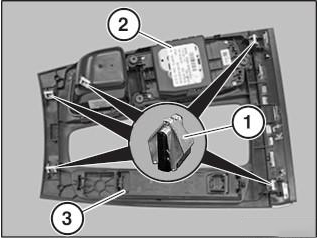
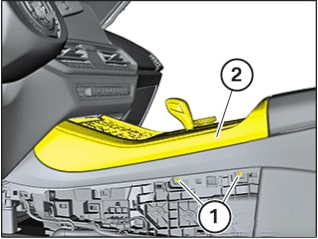
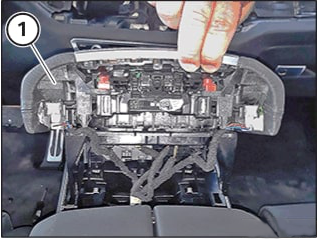
1.Remove the armrest and pry the entire panel off.
2.Disconnect the plug under the iDrive and connect the adaptor cable provided by August.

3.Clips on the panel.
Notes:
Tools and sharp edges may cause injuries!
~Use protection appropriate for the work to be performed~Be careful with the parts and tools used
Installation Steps:
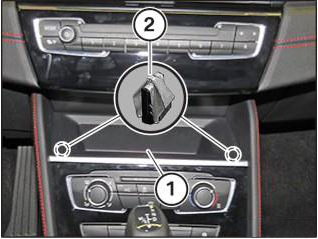
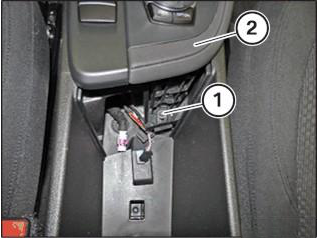
1.Pull the rubber dust cover up and untighten the screw.
2.Pry the entire central console panel off.
3.Disconnect the plug under the iDrive and connect the adaptor cable provided by August.
Notes:
Tools and sharp edges may cause injuries!
~Use protection appropriate for the work to be performed~Be careful with the parts and tools used
Installation Steps:
1.Remove the tray by prying it upwards.
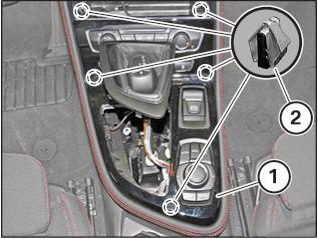
2.Pry the entire panel off.
3.Disconnect the plug under the iDrive and connect the adaptor cable provided by August.
4.Clips on the panel.
Notes:
Tools and sharp edges may cause injuries!
~Use protection appropriate for the work to be performed~Be careful with the parts and tools used
Installation Steps:

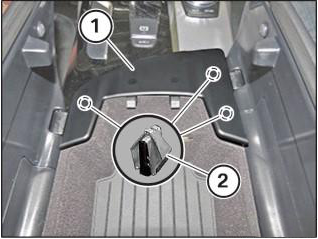
1.Remove the armrest and pry the entire panel off.
2.Disconnect the plug under the iDrive and connect the adaptor cable provided by August.

3.Clips on the panel.
Notes:
Tools and sharp edges may cause injuries!
~Use protection appropriate for the work to be performed~Be careful with the parts and tools used
Installation Steps: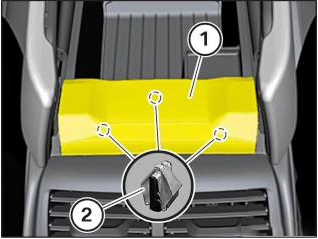
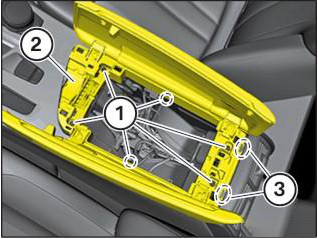
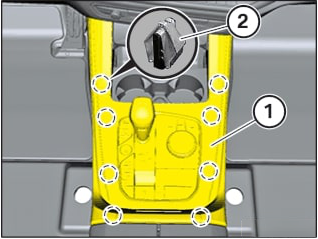
1.First remove both armrests, and then pry the cover off.
2.Untighten the bolt.
3.Pry the central console panel off and remove it.
4.Disconnect the plug under the iDrive and connect the adaptor cable provided by August.
5.Clips on the panel.
4.Disconnect the plug under the iDrive and connect the adaptor cable provided by August.
Notes:
Tools and sharp edges may cause injuries!
~Use protection appropriate for the work to be performed~Be careful with the parts and tools used
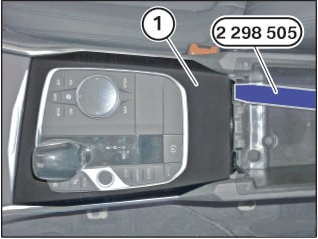
Installation Steps:
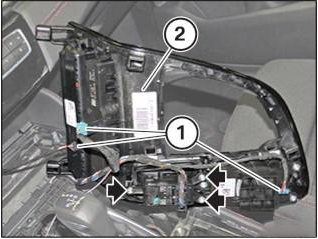
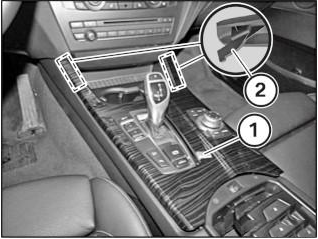
1.Loosen carefully the center armrest panel at the front and remove it from the central console.
2.Untighten the bolts (1) and carefully pry the central console panel (2) off.
3.Disconnect the plug under the iDrive.
Notes:
Tools and sharp edges may cause injuries!
~Use protection appropriate for the work to be performed~Be careful with the parts and tools used
Installation Steps:
1.Pry the cover off and undo the screws.
2.Pry the side cover off and undo the screws.

3.First, remove the soft rubber lining and undo the screws. Then, pry the cover off.
4.Undo the screw and remove the central console panel.
5.Disconnect the plug under the iDrive and connect the adaptor cable provided by August.
5.Disconnect the plug under the iDrive and connect the adaptor cable provided by August.
Notes:
Tools and sharp edges may cause injuries!
~Use protection appropriate for the work to be performed~Be careful with the parts and tools used
Installation Steps:
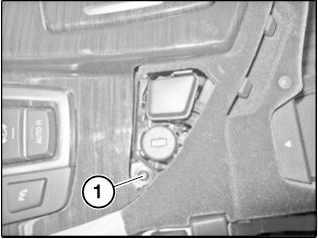
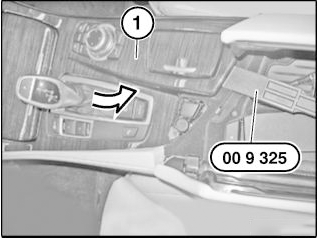
1.Pry the central console panel off from the rear to the front and lift it towards the rear to slide the hook out.
2.Disconnect the plug under the iDrive and connect the adaptor cable provided by August.

3.Clips on the panel.
Notes:
Tools and sharp edges may cause injuries!
~Use protection appropriate for the work to be performed~Be careful with the parts and tools used
Installation Steps:
1.Grab the panel from underneath and pull the panel straight up until all clips are loosened.
2.Disconnect the plug under the iDrive and connect the adaptor cable provided by August.
3.Clips on the panel.
Notes:
Tools and sharp edges may cause injuries!
~Use protection appropriate for the work to be performed~Be careful with the parts and tools used
Installation Steps:
1.Pry the cover at the front of the central armrest off.
2.Pry the cover at the rear of the central armrest off.
3.Undo the screws and remove both armrests.

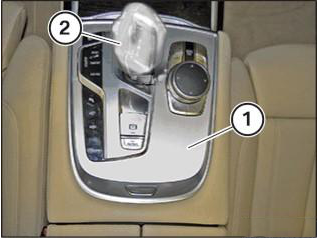
4.Pry the entire central console off.
5.Disconnect the plug under the iDrive and connect the adaptor cable provided by August.
5.Disconnect the plug under the iDrive and connect the adaptor cable provided by August.
Notes:
Tools and sharp edges may cause injuries!
~Use protection appropriate for the work to be performed~Be careful with the parts and tools used
Installation Steps:
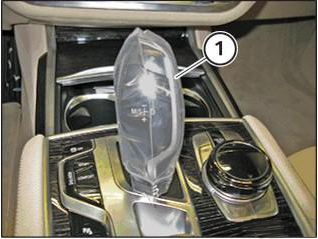
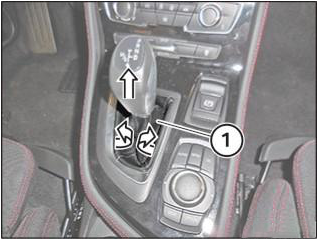
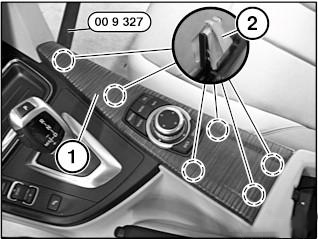
1.Protect the gear shift stick and buttons.
2.Pry the entire central console off.
3.Disconnect the plug under the iDrive and connect the adaptor cable provided by August.
Notes:
Tools and sharp edges may cause injuries!
~Use protection appropriate for the work to be performed~Be careful with the parts and tools used
Installation Steps:
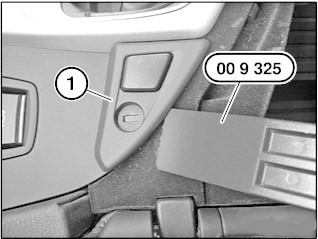
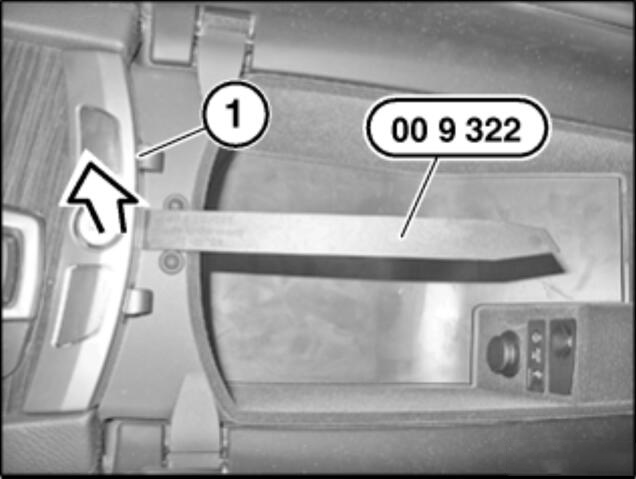
1.From the rear, slowly and carefully pry the entire central console panel off.
2.Disconnect the plug under the iDrive and connect the adaptor cable provided by August.
Notes:
Tools and sharp edges may cause injuries!
~Use protection appropriate for the work to be performed~Be careful with the parts and tools used
Installation Steps:
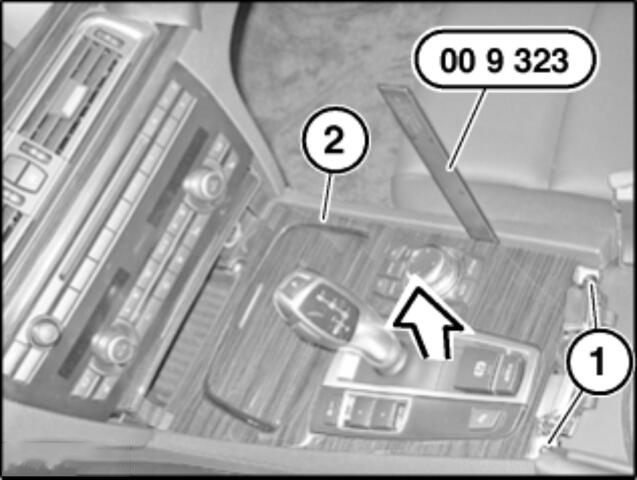
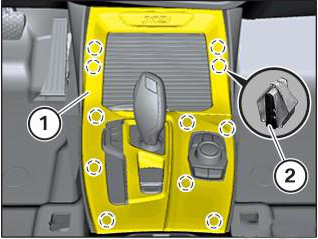
1.Remove the side panel off the central console. (Do the same on the right hand side.)
2.Remove the screws on both sides.
3.Pry the central console panel off and lift it slightly at the rear.
4.Unlock and disconnect the plug under the iDrive.
5.Connect the adaptor cable provided by August.
5.Connect the adaptor cable provided by August.
Notes:
Tools and sharp edges may cause injuries!
~Use protection appropriate for the work to be performed~Be careful with the parts and tools used
Installation Steps:
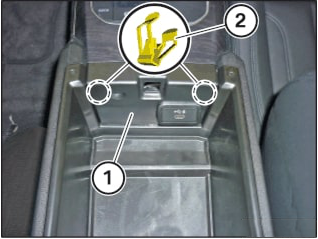
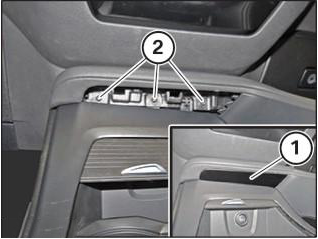
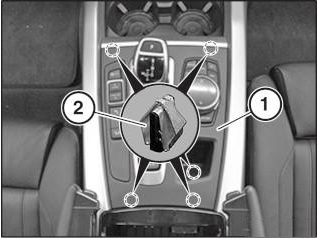
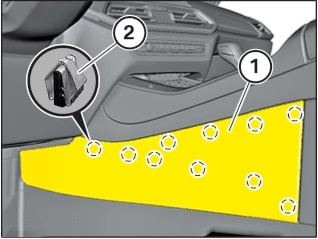
1.Open the cover of the central armrest.
2.Pry the cover (1) backward to remove it.
3.Unlock and disconnect the plug and remove the cover.
4.Pry the central console panel up and remove it.
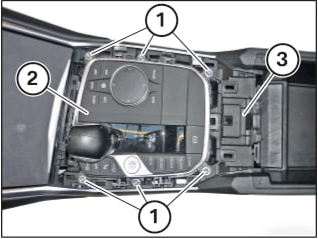
5.Undo the screws (1) and remove the central console unit.
6.Disconnect the plug under the iDrive and connect the adaptor cable provided by August.
2.Pry the cover (1) backward to remove it.
6.Disconnect the plug under the iDrive and connect the adaptor cable provided by August.
Installation Guide - (BMW)
- 1 Series Hatchbacks
- 1 Series Sedans
- 2 Series Wagons
- 3 Series
- 2/4 Series Coupes
- 5 Series
- 7 Series
- X1/X2
- X3/X4
- X5/X6
- 5 Series
- 7 Series
- X3/X4
- X5
- 3 Series

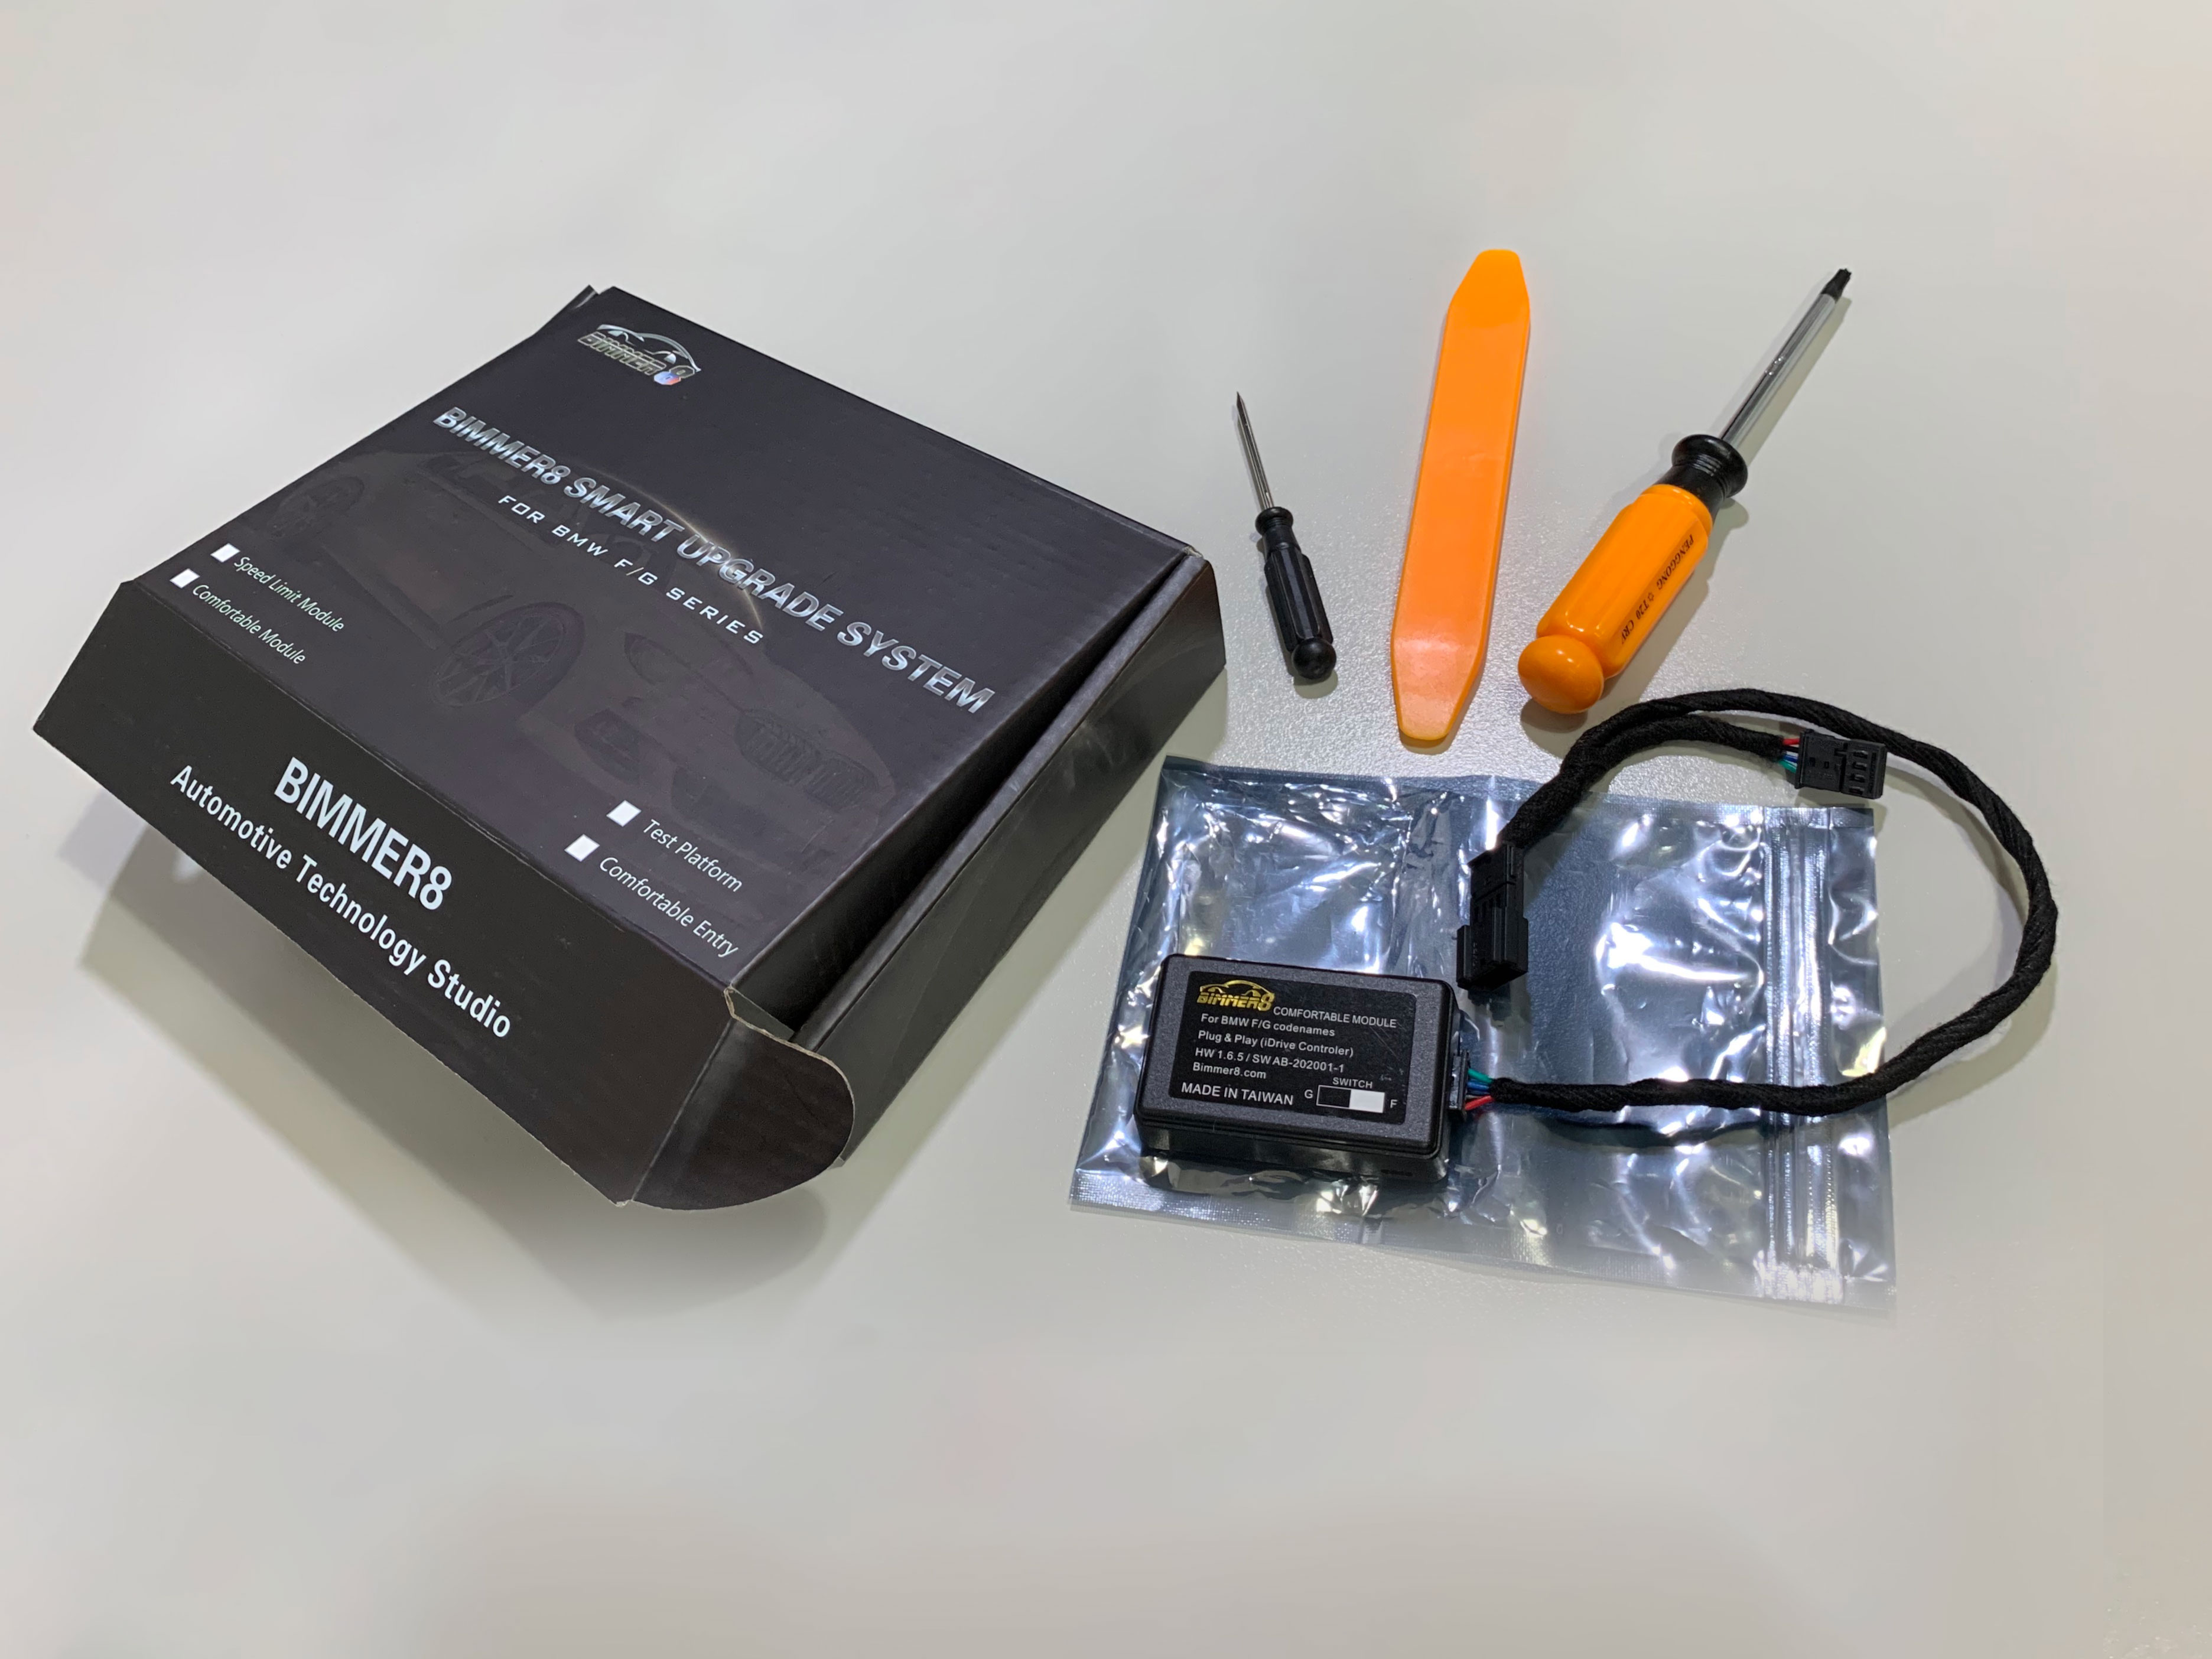
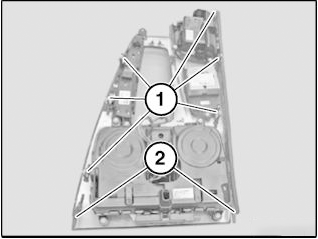
Product Photos